Winged insect sculptures
by Stephanie Danker
Unit theme: Human interaction with nature
Lesson: Winged insect sculptures
Integrated subject: Science
Level: 5
Projected Time: 30 minutes to create wings, 30 minutes to create body of insect with legs, 45 minutes for adding plaster strips,
30 minutes for adding tissue paper color to body, 30 minutes for adding final details with paint, colored wire, glitter glue, sequins
Lesson Overview:
To reinforce students' understanding of insect body parts, ecosystems, and habitats, students will each create a mixed media sculpture of a winged insect.
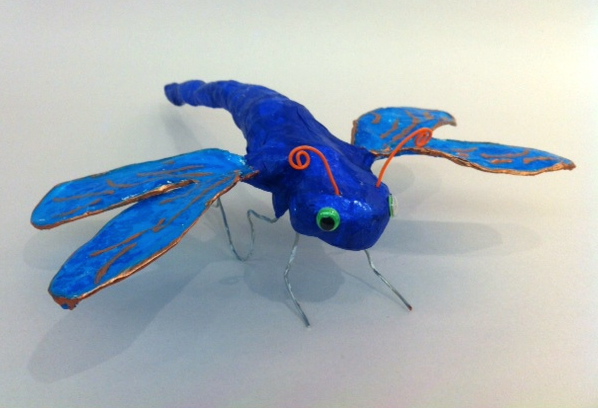
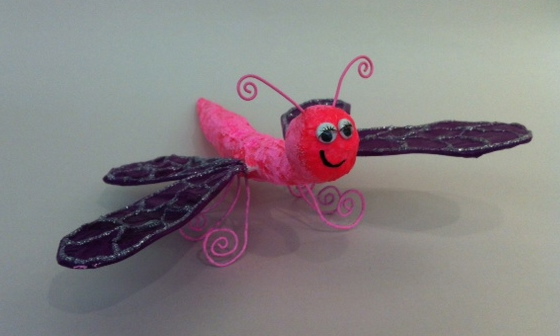
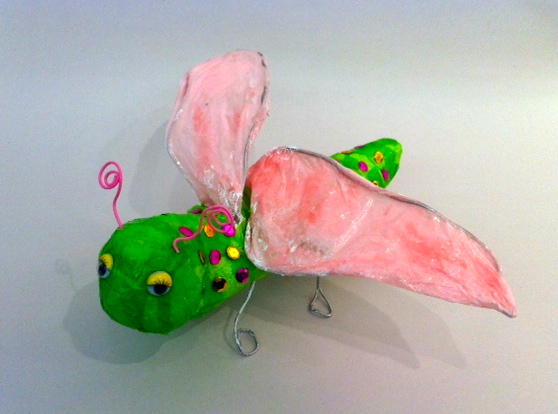
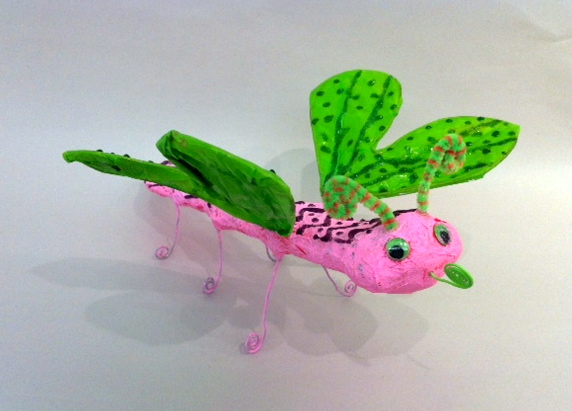
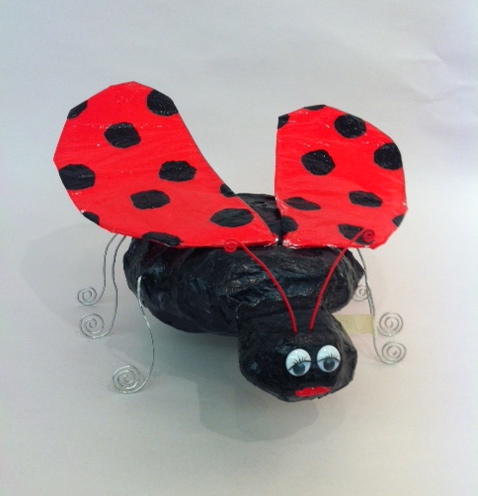
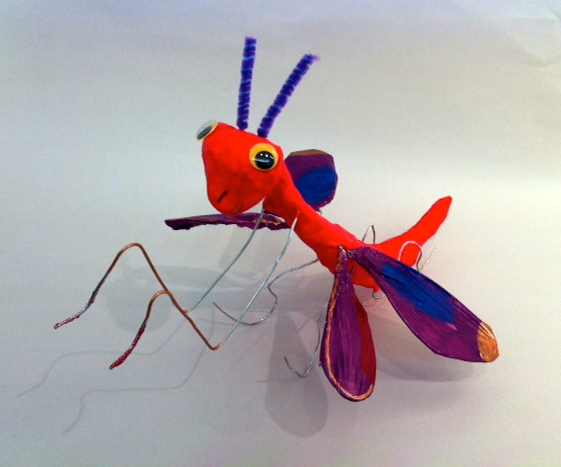
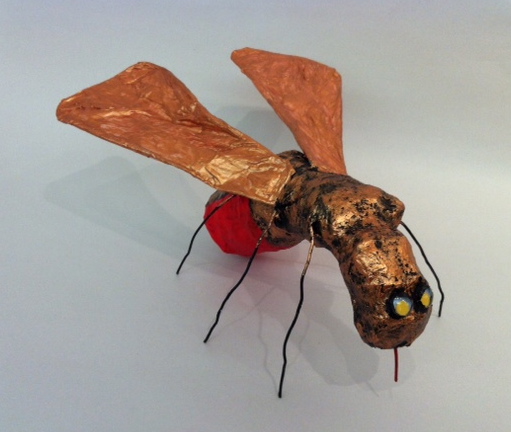
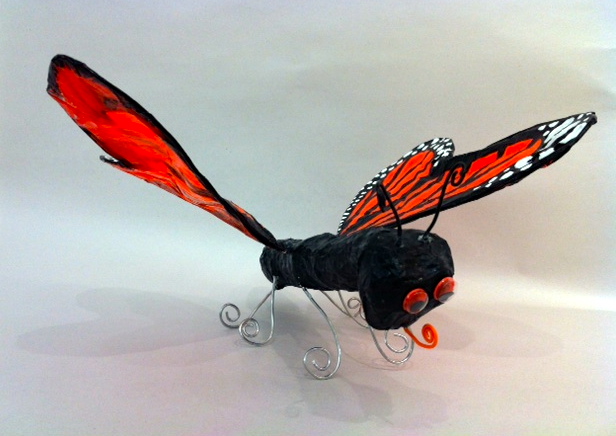
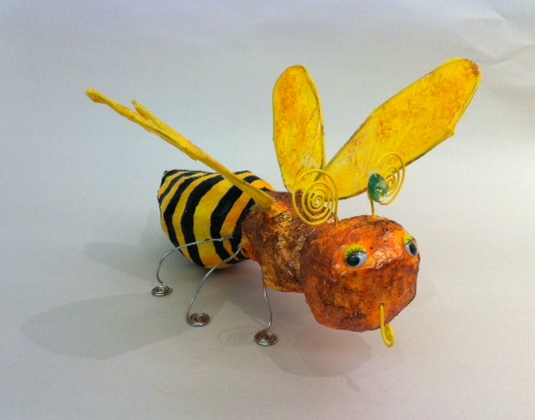
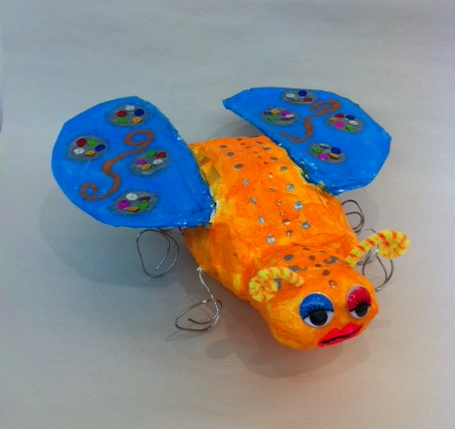
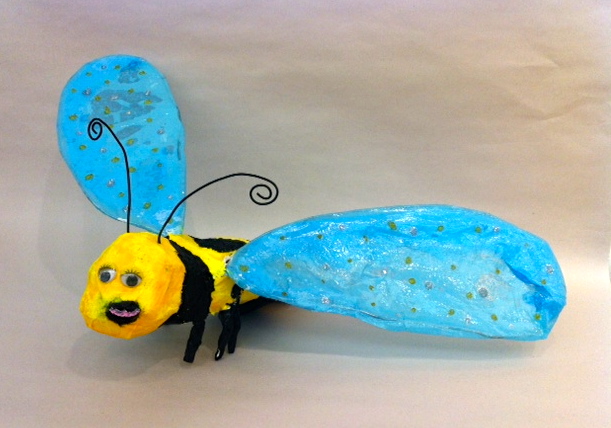
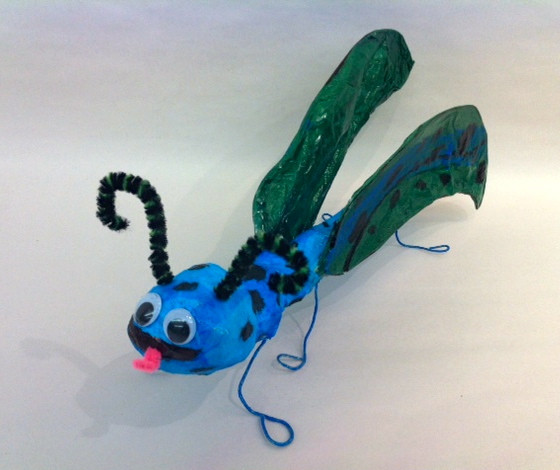
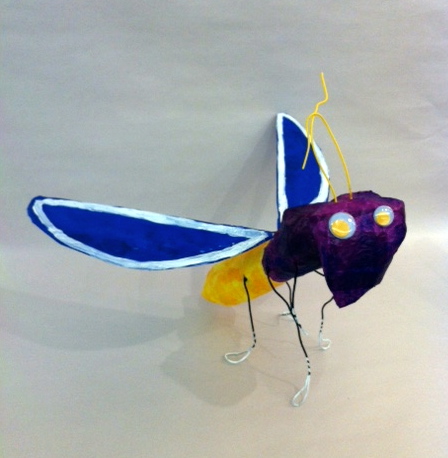
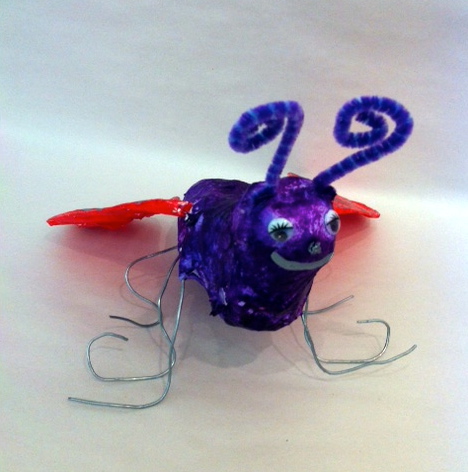
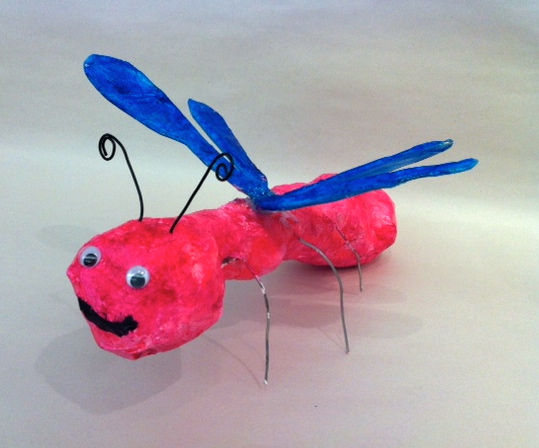
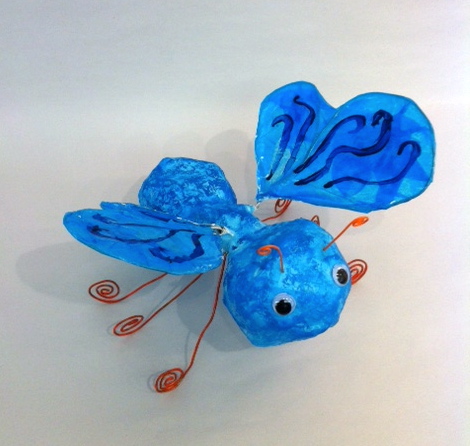
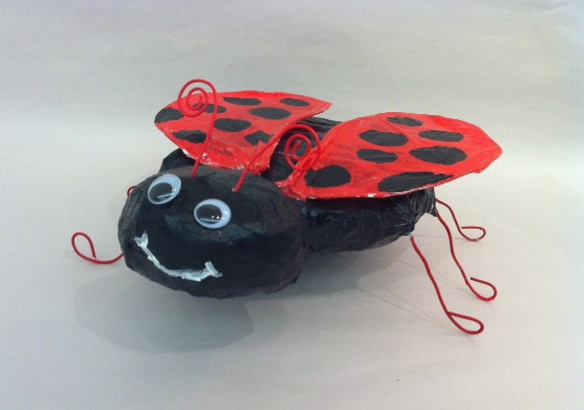
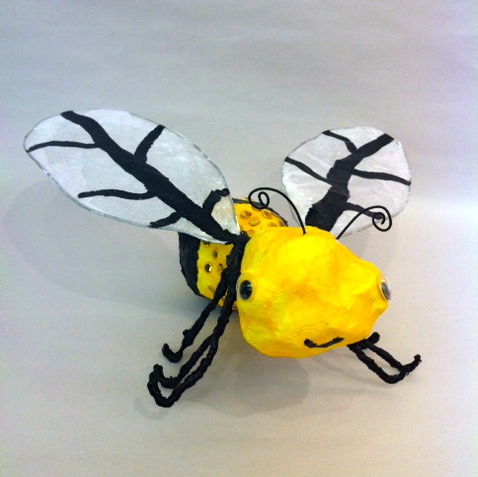
Student work samples from fall 2013:
|
|
|
|
|
|
|
|
|
|
|
|
|
|
|
|
|

|
|

|
|
Visual Culture Component:
Vocabulary:
South Carolina Standards:
Objectives:
The learner will:
Procedures:
Artist or Art History Focus:
Evaluation:
Materials and Preparation (Class of 20):
- Wire cutters
- 2 pieces for each student of (approximately) 24" of wire for wings
- Roll of masking tape (ideally for each student, but students could tear off pieces to use and adhere to side of desk or table until needed, so rolls can be shared--will need masking tape for constructing and forming body of insect and taping wire legs to top of body to keep in place)
- At least 1 sheet of 18" x 24" newsprint for each student (for making body of insect)
- 3 pieces for each student of (approximately) 12" for sets of legs
- Elmer’s glue dispensed into 3 oz. cups with a little water added to it (and mixed) for each student
- Scissors
- Non-bleed tissue paper (one package of 50 assorted sheets)
- Paintbrushes (small foam brushes for applying tissue paper color to insect body; detail brushes for adding paint details once color has been applied)
- Sponge cut into small squares for texture painting
- Acrylic paint in small plastic cups (3 oz.) for final details (or Sharpie permanent markers could also work)
- Optional: Pint of Mod Podge glossy (for sealing in color after completely done—if this will be used, it may be better to add paint details with acrylic)
